EDR R6 Performance Clutch Kit 2006 - 2024 Yamaha
EDR R6 Performance Clutch Kit for Racing + Track days
FINALLY available to the public and ease of drop in!
One of the MOST asked for items is "What clutch should i use in my R6?"
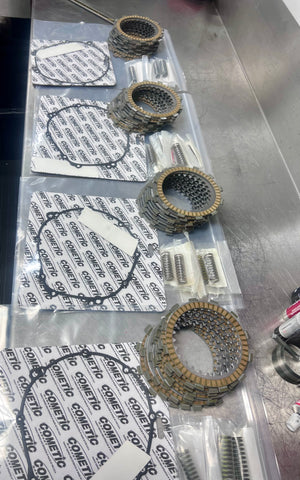
Well we finally got Eric, our companies president and R6 engine builder extraordinaire (he has built WELL over 250+ R6 engines alone, multiple championships, nationals, track records etc) to pre-assemble his exact complete clutch kit for the 2006-2024 Yamaha R6. This is a complete kit based on his 26+ years experience and having done well over 1,000 R6 clutch's. It is 100% drop in, simply remove your clutch pack, soak ours, install it complete with new gasket and GO!
The R6 is an amazing bike and one of the all time most popular sport bikes! However, one of the biggest shortcomings is its OEM slipper clutch set up. We see the oem set up working fine for everyday use, street riding with the stock 100-110 rwhp, however when you take these bikes to the track or if you have added more power like the EDR Performance ECU tune and EDR Performance Velocity stacks, you will soon find the clutch very soft and most often will start to slip after just a few laps! Our top riders (Think Daytona, national championship winning racers) will go thru a clutch ONCE A WEEKEND! Not kidding. It is one of the most forgotten items and yet will kill your drive, power and even entire day in seconds once it is gone! Then what? Trying to find one, find a gasket, hope you got the stack height right, etc? No thanks
This kit is great to start the season off right, we bet 75% of you will pull your clutch and
realize how bad it was and it was on its way out! Also the #1 spare you should have for any R6 racer or track day rider is a SPARE CLUTCH KIT!
We keep ours inside a small 8" round Tupperware container with some oil so it stays soaked and ready to install. Eric has swapped out an entire R6 clutch pack in the pits in under 15 mins (burnt fingers and all) A normal tech/shop should charge less than 1 hour to do properly and a home mechanic with normal tools (5mm Allen and a 10mm socket only needed) can do in about 1 hour time.
One big benefit with our clutch kit is Eric has adjusted the stack height so with our kit and install notes you will have a SMOOTHER entry into every corner! Say goodbye to chatter on downshifts/entering a corner.
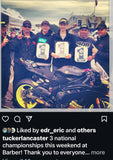
It is 100% drop in and uses only OEM plates! This is 100% the exact setup we run on all our EDR Built/Tuned R6 bikes including those that have shattered track records, racked up numerous championships and podiums at the MotoAmerica 600 class, won numerous WERA Nationals, placed in podium at Daytona multiple times and won championships in other counties even!
Don't be fooled by the others selling aftermarket friction plates, the OEM plates are hands down the best and more consistent.
***you simply install the EDR clutch kit per stock stock, however we change the plates around, if you have a manual its easy. Here is the order you install *MUST SOAK FRICTIONS IN FRESH OIL FOR MIN 1 hr. Also do not reuse old oil, don't be a cheap fuck, replace your engine oil with the new clutch kit.
****DRAIN ENGINE OIL if you can, its always good idea start with fresh engine oil on a new clutch**
1. Remove clutch cover once engine cool
2. Remove pressure plate 6 x 10mm bolts
3. be careful to not lose or bind up the spring seats (oval steel washers under springs)
4. Remove entire clutch pack
5. toss in trash
6. SOAK our clutch pack min 1 hour in CLEAN new oil
7. Install our clutch pack, friction first, then alternate with steels and frictions, finishing with a friction plate last, outer most
8. Ensure the FINAL OUTER friction is offset into the other hub groves per OEM manual
9. Install outer pressure plate with oem oval spring seats and springs
10. Replace clutch cover gasket (ensure BOTH sides are free of old gasket)
11. install clutch cover. It can be tricky but take your time (this is impossible to explain how Eric installs cover in 5 seconds even our own techs cant but he has done 1000+) ENSURE THE small Arrow on the cover aligns with the dot on the arm once installed completely
12. Readjust your clutch lever to have MIN 5mm free play (think of a Nickel width air gap in the lever free play as guideline)
13. INSTALL FRESH ENGINE OIL ALWAYS with a new clutch!
14. Go ride and have fun or win!
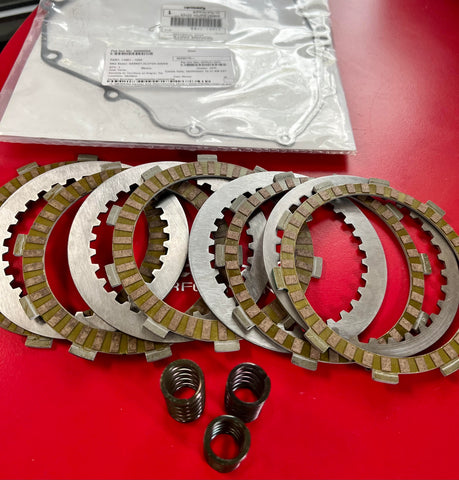
KIT INCLUDES:
-All Friction Plates
-All Friction Plates
-All Steel Plates
-OEM Clutch Cover Gasket
-OEM Clutch springs
**OPTIONAL+12% stronger springs are available, these are recommend for higher hp R6 builds, mini spring use or if you have modified slipper to the lightest slip setting
**NOTES: Highly suggest you cut off 3 ears on 1-2 of the outer springs. Typically a street/track day rider we will only modify/cut off the outer springs 3 spider fingers, if you are a VERY fast R6 racer, have a built engine you may wish to cut off both the outer springs spider fingers (6 total) You must be a trained tech to do so, however if your shop/tuner knows how to remove center clutch main nut underneath are QTY 3 of the "3 finger spider springs" and your tech will cut off the 3 ears on the outer 1 or 2 springs, the inner 1 spring must have all 3 fingers still per stock. Then must red loc-tite and torque center clutch nut. Again if you do not know how, DO NOT DO IT. EDR does not offer any technical advice or support on this.
